
If you’re preparing to take the phlebotomy certification exam, this guide will walk you step by step through every tip, strategy, and resource you need to succeed. Whether you’re studying for NHA, ASCP, NCCT, or a local board, you’ll find actionable advice, exam breakdowns, and interview prep. And yes — we’ll also point you to a premium resource you can purchase for exam practice.
Table of Contents
- How Many Questions Are on the Phlebotomy Certification Exam?
- How Hard Is the Phlebotomy Certification Exam?
- How to Prepare for the Phlebotomy Exam (2025 Guide)
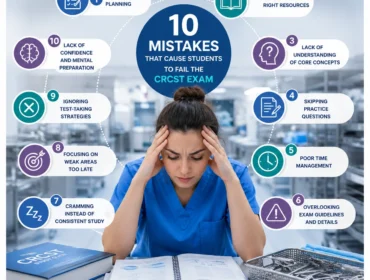
- 10 Key Strategies to Pass the Phlebotomy Exam
- How to Prepare for a Phlebotomy Interview
- Topic | % Weight | Example Questions (Comparison Table)
- Final Tips & Next Steps
How Many Questions Are on the Phlebotomy Certification Exam?
One of the most common questions students ask is: “How many questions will I have to answer?” The answer depends on the certifying body you’re testing through, but here are a few widely used models:
- NHA / CPT exam: The NHA Certified Phlebotomy Technician (CPT) exam typically has **120 multiple-choice questions**, of which **100 are scored** and 20 are unscored “pretest” items.
- ASCP Phlebotomy (PBT) exam: The ASCP PBT (Phlebotomy Technician) exam is currently structured with **80 multiple-choice questions** within a 2-hour period.
- NCPT / NCCT model: The NCPT exam often uses **125 questions**, of which 25 are unscored, and you are allotted about 3 hours.
- Other boards / local exams: Some state or local phlebotomy certification exams may have 50–100 questions, but the standard in many national exams is 80–125 items.
In short: expect somewhere between **80 and 125 questions**, with many major exams clustering at **100–120 questions**. Always check the official handbook for your certifying body to verify the exact number and breakdown.
How Hard Is the Phlebotomy Certification Exam?
“How difficult is this exam?” is another key concern. The short answer: it’s challenging — but absolutely conquerable with smart preparation. Here’s a breakdown of what makes it hard, and how to overcome those hurdles.
What makes the exam challenging:
- Wide breadth of content: The test covers many domains including safety, specimen handling, anatomy, collection techniques, quality assurance, special collections, and legal/regulatory standards.
- Mixed theory and application: You’ll be tested not only on factual knowledge (e.g. tube additives, blood components) but on procedural judgment (e.g. how to handle a hemolyzed specimen, troubleshooting).
- Time management: For example, completing 120 questions in 120 minutes demands pacing and avoiding getting stuck on one question for too long.
- Scaled scoring / question weighting: Some exams use scaled scoring, where not all questions are equal. The NHA exam, for instance, assigns more weight to more difficult questions. The passing threshold is 390 (on a 200–500 scale).
- Clinical skill expectation: You’ll often need to have completed a certain number of live venipunctures or capillary draws in a training setting, and the examination may test on safe technique and complication management.
What test-takers say:
“NHA practice tests all the way … besides the basics like order of draw, additives, how many times to invert tubes … good luck — you got this!”
“There is a large test … as long as you pay attention in class you should be fine.”
These quotes reflect the consensus: the exam is tough, but with consistent effort and the right tools, many first-attempt takers succeed.
In summary, the exam’s difficulty is moderate to high — not insurmountable. It demands both depth and competence, but the biggest barrier is often **lack of preparation**, not the subject itself.
How to Prepare for the Phlebotomy Exam (2026 Guide)
This section is your 2025 prep roadmap — updated, actionable, and optimized to help you pass the exam. Each of the following approaches builds toward exam readiness. Use them together for maximum effect.
1. Understand Your Exam Blueprint & Weighting
The first step to smart studying is knowing what to study. Download or consult the test content outline or blueprint from your certifying organization. This shows the domains, their weight (percentage of exam), and types of skills tested. Focus your attention proportionally: high-weight domains deserve more time.
For example, the phlebotomy exam often includes these domains:
- Safety, compliance, infection control
- Patient preparation, identification, consent
- Routine blood collection (venipuncture, capillary, order of draw)
- Special collections (e.g. blood cultures, therapeutic phlebotomy)
- Specimen processing, handling, transport
- Quality control, error prevention
Allocate your study hours roughly by domain weight. If “collection technique” is 30% of exam weight, spend 30% of your study hours there (but always revise weaker sections too).
2. Build a Realistic Study Schedule
Without a schedule, motivation wanes and topics get neglected. Plan a daily or weekly regimen. For example:
- Week 1: Review anatomy/physiology, blood cell types, vascular system
- Week 2: Infection control, safety, regulatory rules (OSHA, HIPAA, biohazard disposal)
- Week 3: Venipuncture technique, order of draw, best practices
- Week 4: Special collections, troubleshooting, tube additives
- Week 5: Specimen handling, quality assurance, error prevention
- Week 6: Full practice exams + review weak spots
Block consistent times for study — e.g. 1 hour every weekday evening — and track progress. Adjust as necessary based on comfort with each domain.
3. Use High-Quality Study Materials & Textbooks
Don’t rely purely on lecture notes. Supplement with textbooks and reference guides used by professionals. Use current editions of phlebotomy or medical laboratory textbooks. Seek out resources that provide both theory and practical scenarios.
Also, invest in **practice exam packages** that mimic the real exam format. One strong choice is the Phlebotomy Practice from PrepPool, which offers realistic questions, detailed explanations, and timed simulation features. This resource helps convert theory into exam performance.
4. Drill with Practice Tests & Simulated Exams
Practice tests are your secret weapon. They do more than test — they train your brain to think in exam mode. Use full-length timed tests, and simulate real exam conditions (no interruptions, self-timing). After each test, rigorously review every incorrect item, understand why the wrong options were wrong, and integrate that learning into your next round.
The more you do full-length tests, the more comfortable you become with pacing and fatigue. Also, many test-prep tools adapt difficulty based on your performance — giving you harder questions when you demonstrate mastery. The PrepPool product supports this kind of adaptive drill approach.
5. Practice Hands-On Skills & Think in Scenarios
Phlebotomy isn’t just book knowledge — there’s a motor skills component. During your training sessions or clinical labs, practice venipuncture, capillary draws, proper handling of tubes, labeling, and dealing with problems (e.g. collapsed veins, hematomas, lipemic samples). Visualize real patient cases while studying theory.
Also, use scenario-based study techniques: imagine you face a patient fainting, or a sample is hemolyzed — what is your best action? These scenario questions appear often on real exams.
6. Use Mnemonics, Memory Tricks & Visualization
Memory devices help you recall order of draw, tube additives, bleeding times, etc. Some useful mnemonics include:
- “Stop, Light, Red, Go, Lavender, Grey” for order of draw (simplified)
- “Boys Love Ravishing Girls Like Dieters Love Greek Salad” (Blood culture, Light Blue, Red, Gold, Green, Lavender, Grey)
Use flashcards (physical or digital) to drill additives, anticoagulants, expected tests, normal ranges, etc. Visualization helps: picture drawing from the antecubital fossa, imagining proper needle angle and tube insertion.
7. Focus on Weak Areas & Use Spaced Repetition
As you practice, track topics you consistently miss (e.g. specimen transport, special tubes). Dedicate extra sessions to those weak areas. Use spaced repetition — revisit a difficult topic after 1 day, then 3 days, then 7 days — to reinforce memory.
8. Join Study Groups or Peer Review Sessions
Group study helps expose you to different perspectives and questions you might not have considered. Quiz each other, explain concepts aloud, or debate choices. Teaching is one of the best ways to reinforce your own understanding.
9. Practice Under Time Pressure and Stress Conditions
Exam stress is real. Practice under timed conditions, simulate distraction, and build stamina. Some test-prep tools allow “stress mode” that gives you a countdown and limited review time. The key is to make your practice sessions mimic exam conditions as closely as possible.
10. Final Weeks: Review, Rest & Confidence Building
In the week before your exam, taper new studying. Instead, do light review — flashcards, quick quizzes, recap of high-yield areas. Avoid cramming huge new topics. Ensure you sleep well, eat well, and stay mentally positive. On exam day, arrive early, read instructions carefully, pace yourself, and keep calm.
10 Key Strategies to Pass the Phlebotomy Exam
Point 1: Master Safety, Infection Control & Compliance
This domain is foundational — you cannot afford to fumble on questions about bloodborne pathogens, universal precautions, sharps disposal, OSHA, HIPAA, or quality control. To master it, begin by thoroughly reviewing your course’s infection control and lab safety modules. Use a guideline or reference manual (CDC, CLSI) to memorize proper disposal protocols (e.g. biohazard bins, sharps containers), decontamination procedures, and personal protective equipment (PPE) sequences.
Next, incorporate scenario-based drills: imagine a needle stick, a spill, or patient with an unknown infectious status — what steps do you take? Use practice test items specifically targeting these protocols. Over time, the logic behind the rules will become intuitive, which is critical because many test questions are situational (e.g. “Which action is the safest?”). Also, deep understanding is better than rote memorization: when you know why a rule exists, you can often eliminate distractor options.
Finally, integrate safety protocols into other domains. For instance, while reviewing specimen handling or transport, always overlay the safety lens: how do you package a sample to avoid contamination or leakage? By embedding safety into all your study areas, you ensure you never neglect this high-risk topic on exam day.
Point 2: Nail Patient Identification, Consent & Pre-draw Procedure
A surprisingly large number of exam errors stem from weak patient preparation steps. This includes verifying identifiers (name, DOB, ID wristband), confirming test orders, reviewing patient history (fasting, allergies, previous draws), hand hygiene, site selection, and skin antisepsis. Often, questions will require you to choose the “best” sequence of steps — one small misordering can cost points.
To build strength here, practice writing out your “standard operating procedure” from patient check-in through tourniquet application. Quiz yourself: which comes first — labeling or draw? What must you check before venipuncture? Use scenario questions upstream in practice sets: e.g. what if the patient’s name doesn’t match the requisition? Also memorize timelines (e.g. allow alcohol to dry ~30 seconds) and contraindications (e.g. avoid IV lines, bypass limbs with fistula, avoid hematoma sites).
Incorporate this domain in your practice exams and review every mistake: if you mis-ordered a sequence, map out the correct flow. Eventually, this area becomes second nature. Because it’s a frequent question domain, excellence here boosts your score steadily.
Point 3: Perfect Venipuncture & Capillary Technique
This is the “core skill” domain: proper angle, depth, tube order, needle handling, and troubleshooting. Many exam items hinge on fine principles (e.g. what to do if blood doesn’t flow, handle a collapsed vein, tourniquet time, repositioning). To master it, you must combine theory with physical practice.
Practice on training arms or models until your muscle memory is solid. While doing that, envision what you read: visualizing your path from needle insertion through bleed, tube filling, and withdrawal. Review tube additives and order of draw, so when a question mentions a test type (e.g. coagulation, chemistry), you instinctively know which tube fits. Also drill common errors (hemolysis, hemoconcentration, cross-contamination) and how to avoid them.
During practice exams, mark the venipuncture questions you missed and revisit them with extra weight. Keep a log: which technique subtopic do you struggle with? Focus supplemental sessions on that. When exam day comes, you want enough confidence in every movement to not overthink — your routine should flow naturally.
Point 4: Master Tube Additives, Specimen Types & Order of Draw
Many students stumble here because they mix up additives, anticoagulants, and which tube is correct for which test. On exams, you’ll see questions like “Which tube (color) is used for coagulation? What additive is in a lavender tube?” To answer correctly under time pressure, you need automatic recall.
Create a table or flashcards mapping tube colors to additives and common tests (e.g. light blue = sodium citrate for coagulation; lavender = EDTA for CBC). Use mnemonic devices to help recite order of draw. Drill matching quizzes frequently. When doing full practice tests, pay attention to any tube item you miss and reinforce it immediately.
Also practice “wild card” scenarios: a question may provide test order and you must select the next tube; or it may test additive interference. Develop logic for eliminating distractors: e.g. if a question mentions clotting analysis, then tubes with anticoagulants are wrong, etc. Over time, the mapping between tube and test should become reflexive, which is crucial under exam timing constraints.
Point 5: Handle Special Collections & Difficult Cases
Beyond routine venipuncture, exams often include “special” collection scenarios: drawing blood cultures, pediatric heel sticks, therapeutic phlebotomy, or arterial draws (if in scope). These tend to have trickier rules and higher penalty for error. You must know when to use alternate techniques, how to prevent contamination, and how to handle difficult veins or patient conditions.
To prepare, gather specialized modules or practice sets on these special scenarios. Read through case studies and imagine how you’d act: e.g. for a blood culture draw, cleanse the site carefully, draw aerobic before anaerobic, etc. Use your practice exams to spot areas you consistently miss. If your test resource (like the PrepPool practice package) includes special collection items, do those repeatedly.
Because special collection questions are often fewer in number but higher in conceptual difficulty, mastering them can give you an edge — fewer mistakes in harder areas often separates pass from fail.
Point 6: Specimen Processing, Transport & Quality Control
After blood is drawn, it needs proper handling: labeling, centrifugation, storage, transport conditions, error checks, and timely delivery. Many exam questions test your knowledge of allowable temperature ranges, maximum delay times, handling of hemolyzed or lipemic samples, and quality assurance measures (e.g. recognizing sample rejection). You must be precise.
Set aside focused study time on specimen stability (which analytes degrade quickly), permissible delays, light sensitivity, centrifuge speeds, and transport specifications. Use sample questions to test scenario comprehension: e.g. if a sample sat in a hot car for an hour, what’s the likely effect? Use flowcharts or timelines to visualize sample life cycle.
When doing practice tests, isolate all questions in specimen handling, review mistakes, and commit “stable windows” to memory (e.g. potassium, glucose, coag tests). Because errors in this domain can be subtle, layering repetition is key. A single misstep here can cost points — but strong performance can boost your confidence.
Point 7: Recognize & Manage Complications & Troubleshooting
The exam may ask you to respond to complications: hematoma, fainting, hemolysis, lipemia, sample mismatch, collapsed veins, or patient conditions (e.g. edema, burns). Knowing protocols and fallback strategies is essential. This domain requires both procedural knowledge and rapid judgment.
Create scenario lists: for each complication, write the safest next action. Quiz yourself on those. Use practice exam items that pose a complication and ask for best response (not just “what went wrong,” but “what do you do now?”). During lab practice, simulate mistakes or failures (in a controlled environment) and practice correct remediation steps.
After each practice exam, flag the complication/troubleshooting questions and review with special attention. As you practice, these questions should gradually shift from “hard guess” to “reflexive correct answer,” which is essential when under pressure on exam day.
Point 8: Use Practice Exams Strategically, Not Just Frequently
Many students make the mistake of flooding themselves with practice exams without reviewing mistakes deeply. The smarter approach is: take a practice test, then spend equal (or more) time dissecting each wrong answer. Understand *why* you’re wrong, revisit theory, and retake similar sets.
Also, begin each study session with a short timed quiz to warm your brain. Alternate between domain-specific practice and full tests. Increase the difficulty gradually. Use adaptive or customizable test pools if available (e.g. increase proportion of your weak topics). Use the PrepPool exam package because it provides realistic question difficulty, answer explanations, and timed features — making your practice efficient and closer to the actual exam environment.
Finally, in later weeks, simulate full exams under test-day conditions: silence, strict timing, no distractions. After each run, simulate the recovery: review your flagged questions, rest well, and reattempt only the subset you missed. That reinforces learning without burnout.
Point 9: Manage Time, Stress & Psychological Readiness
On exam day, the clock is your real competitor. You might be strong in all domains but lose swings because you dwell too long on a question. To prevent this, train with timed constraints and practice skipping or marking tough questions to return later. Use “two-pass strategy”: First pass, answer all easy questions; second pass, tackle moderate ones; third pass, revisit the hardest.
Also cultivate psychological readiness: simulate exam anxiety in practice sessions, practice deep breathing, use positive self-talk (“I have prepared well”), and avoid negative thinking mid-test. Visualize a smooth test session before you sleep the night before. Keep in mind: maintaining calm and pace often matters more than knowing every obscure fact. Practice under mild stress (timing, limited breaks) bridges the comfort gap between practice and test day.
Finally, on exam day, arrive early, carry extra pens, water, valid ID, and a light snack. Read directions carefully, don’t rush, and if you hit a difficult item, mark and move on — you’ll save critical time for other questions.
Point 10: Post-Exam Review & Learning for Next Attempt
Not all test takers pass on the first try, and that’s okay. Approach every exam — pass or fail — as a learning experience. After you finish the test, when permitted, review which domains you struggled with. Use that insight to guide your next study cycle.
If your score report gives domain breakdown, allocate study time proportionally. Use alternate resources or different practice question banks to cover blind spots you missed before. Retake full exams at spaced intervals, focusing more on your weak zones. If possible, join peer groups or tutoring sessions for guidance on difficult areas.
Also, test your endurance: sometimes, poor performance stems from fatigue, not knowledge gaps. Gradually increase your full-exam frequency, build mental stamina, and refine your time management strategy. You’ll find that the second attempt often feels easier — because you’ve ironed out pacing, avoided repeated misconceptions, and optimized your study path.
How to Prepare for a Phlebotomy Interview
After acing the exam, your next challenge might be landing a job. Many entry-level phlebotomy positions require an interview (clinical lab, hospital, clinic). Here’s how to prepare and stand out.
Understand the Role & Common Questions
Start by studying the job description: know which tests the facility runs, what patient populations you’ll serve, whether you’ll draw from pediatric or geriatric patients, and what quality control systems they use. Anticipate common interview questions like:
- “Tell me about your phlebotomy training and hands-on experience”
- “How do you handle a patient who faints or is anxious?”
- “What steps do you take to verify patient identity?”
- “Explain hemolysis and how you prevent it”
- “Describe how you would handle a mislabeled specimen”
- “How would you handle a difficult draw (collapsed vein, difficult patient)?”
- “Why do you want to work in phlebotomy / healthcare?”
Prepare concise, specific answers using the STAR method (Situation, Task, Action, Result). E.g. “In a clinical rotation, a patient had rolling veins; I anchored, used a smaller gauge, and succeeded. The patient thanked me for my calm approach.”
Demonstrate Technical Knowledge & Soft Skills
Interviewers often test your conceptual grasp — they may ask scenario or troubleshooting questions (e.g. “What would you do if a blood sample is lipemic?”). Be ready to talk about your test prep (mentioning that you used rigorous practice tools) and technical reasoning. Use proper vocabulary (e.g. “hemoconcentration,” “preanalytical error,” “tourniquet release within one minute,” etc.).
Equally important is your interpersonal and patient care skills. Phlebotomists deal with anxious or medically fragile patients. Emphasize your empathy, communication, ability to explain procedures, maintain patient comfort, and your respect for safety and infection control.
Mock Interviews & Role Play
Practice with classmates, mentors, or friends. Role-play draw scenarios, difficult patients, and error rectification. Record yourself (video or audio) and review your body language, clarity, and confidence. The more you practice, the smoother you’ll sound under real pressure.
Prepare Questions for the Interviewer
Always have thoughtful questions ready, which show you’re serious about the role and the institution. For example:
- “What quality assurance protocols does your lab follow?”
- “How many patients do phlebotomists draw per shift here?”
- “What is the procedure for hemolyzed or rejected samples?”
- “What is your training / supervision model for new phlebotomists?”
This not only gives you useful information, but signals that you care about doing the job well.
Follow Up & Portfolio
After the interview, send a thank-you email briefly restating your enthusiasm and a unique value you’d offer (e.g. strong exam prep, commitment to quality). If you have documentation — e.g. scores, list of successful venipunctures, training certificates — bring a portfolio (or PDF) to show. Small touches can tip the balance in your favor.
Topic | % Weight | Example Questions (Comparison Table)
| Topic | % Weight (Approx.) | Example Questions |
|---|---|---|
| Safety, Compliance & Infection Control | 10–15 % | “What is the proper disposal method for a used needle?” “Which PPE sequence is correct?” |
| Patient Identification & Preparation | 10–15 % | “What identifiers must you verify before draw?” “What if patient’s name doesn’t match requisition?” |
| Routine Blood Collection (Venipuncture / Capillary) | 25–35 % | “Which tube first in order of draw?” “What is the proper needle angle?” |
| Special Collections & Difficult Draws | 5–10 % | “How to draw blood culture?” “How to manage a collapsed vein?” |
| Specimen Handling, Transport & Processing | 15–20 % | “How long before plasma degrades?” “What temperature for specimen storage?” |
| Quality Control & Error Prevention | 10–15 % | “How to identify a hemolyzed sample?” “What steps minimize preanalytical errors?” |
| Troubleshooting & Complications | 5–10 % | “Patient faints — what do you do next?” “How to respond to hemolysis?” |
Final Tips & Next Steps
- Register early and know logistics: Know your test center, required ID, arrival time, and allowed materials.
- Use the right purchase resources: A premium practice exam product like PrepPool’s Phlebotomy Test Bank gives you authentic, timed, detailed exam simulation—boosting your confidence and competence.
- Balance depth & breadth: Don’t skip “less sexy” domains — they often decide the margin between passing and failing.
- Take care of your health: Sleep, nutrition, breaks — your brain is your primary instrument.
- Don’t fear failure: If you don’t pass on first try, use the score breakdown to target weak areas, practice more, and return stronger.
With consistent effort, smart strategy, and high-quality practice tools, passing your phlebotomy certification exam is well within reach. Good luck — and remember, each draw you practice and each question you review brings you closer to success!
📢 Share This Guide
Help other medical students prepare for the Phlebotomy Certification Exam (2025) — share this post:

%20-%20Step-by-step%20study%20plan%2C%20practice%20tests%2C%20and%20exam%20prep%20strategies%20for%20success.)
PrepPool.com — Helping students study smarter and pass every certification exam.